Craft Vendor Market Set-Up
Hi pals! Today we are talking about being a craft vendor and my market set up(s). I recently got back into doing markets as an artist, and with a few under my belt I figured why not share what I've learned so far! I was on Pinterest looking up "vendor layouts" and "craft vendor set-up" and I just couldn't find anything for clothing artists, artists who make a variety of crafts, or any queer artists. I love the prints and stickers and plushie vendors, don't get me wrong, but those set-ups just don't work for my art.
So, if you are a crocheter, knitter, sew, paint, do resin work, diamond art, jewelry making, or are just nosy and want to know what goes into my booths and what I sell, keep reading!
There are affiliate links below for the items I have bought with my own money. You don't have to click on the links, but if you do and you make a purchase, I get a little commission at no extra cost to you. That helps keep this site up and running, and every now and then adds a few skeins to my stash, so thank you for using them!
Vendor Set-Up # 1 - 6 foot table only
My first set up is just a single 6 foot table set up. This one takes me about 20 minutes to set up and fidget with, but it's been super successful at the two spaces I vended at with it. (One was a huge market along the Pride Parade route in Seattle, and the second was at the Gantry Public House Arena with a pop-up!)
First up, you need a 6 foot table. Some places allow larger like 8 feet, but I know most vendors have a 4 foot or 6 foot folding table somewhere in their booth supplies and thats typically what pop-ups have space for.
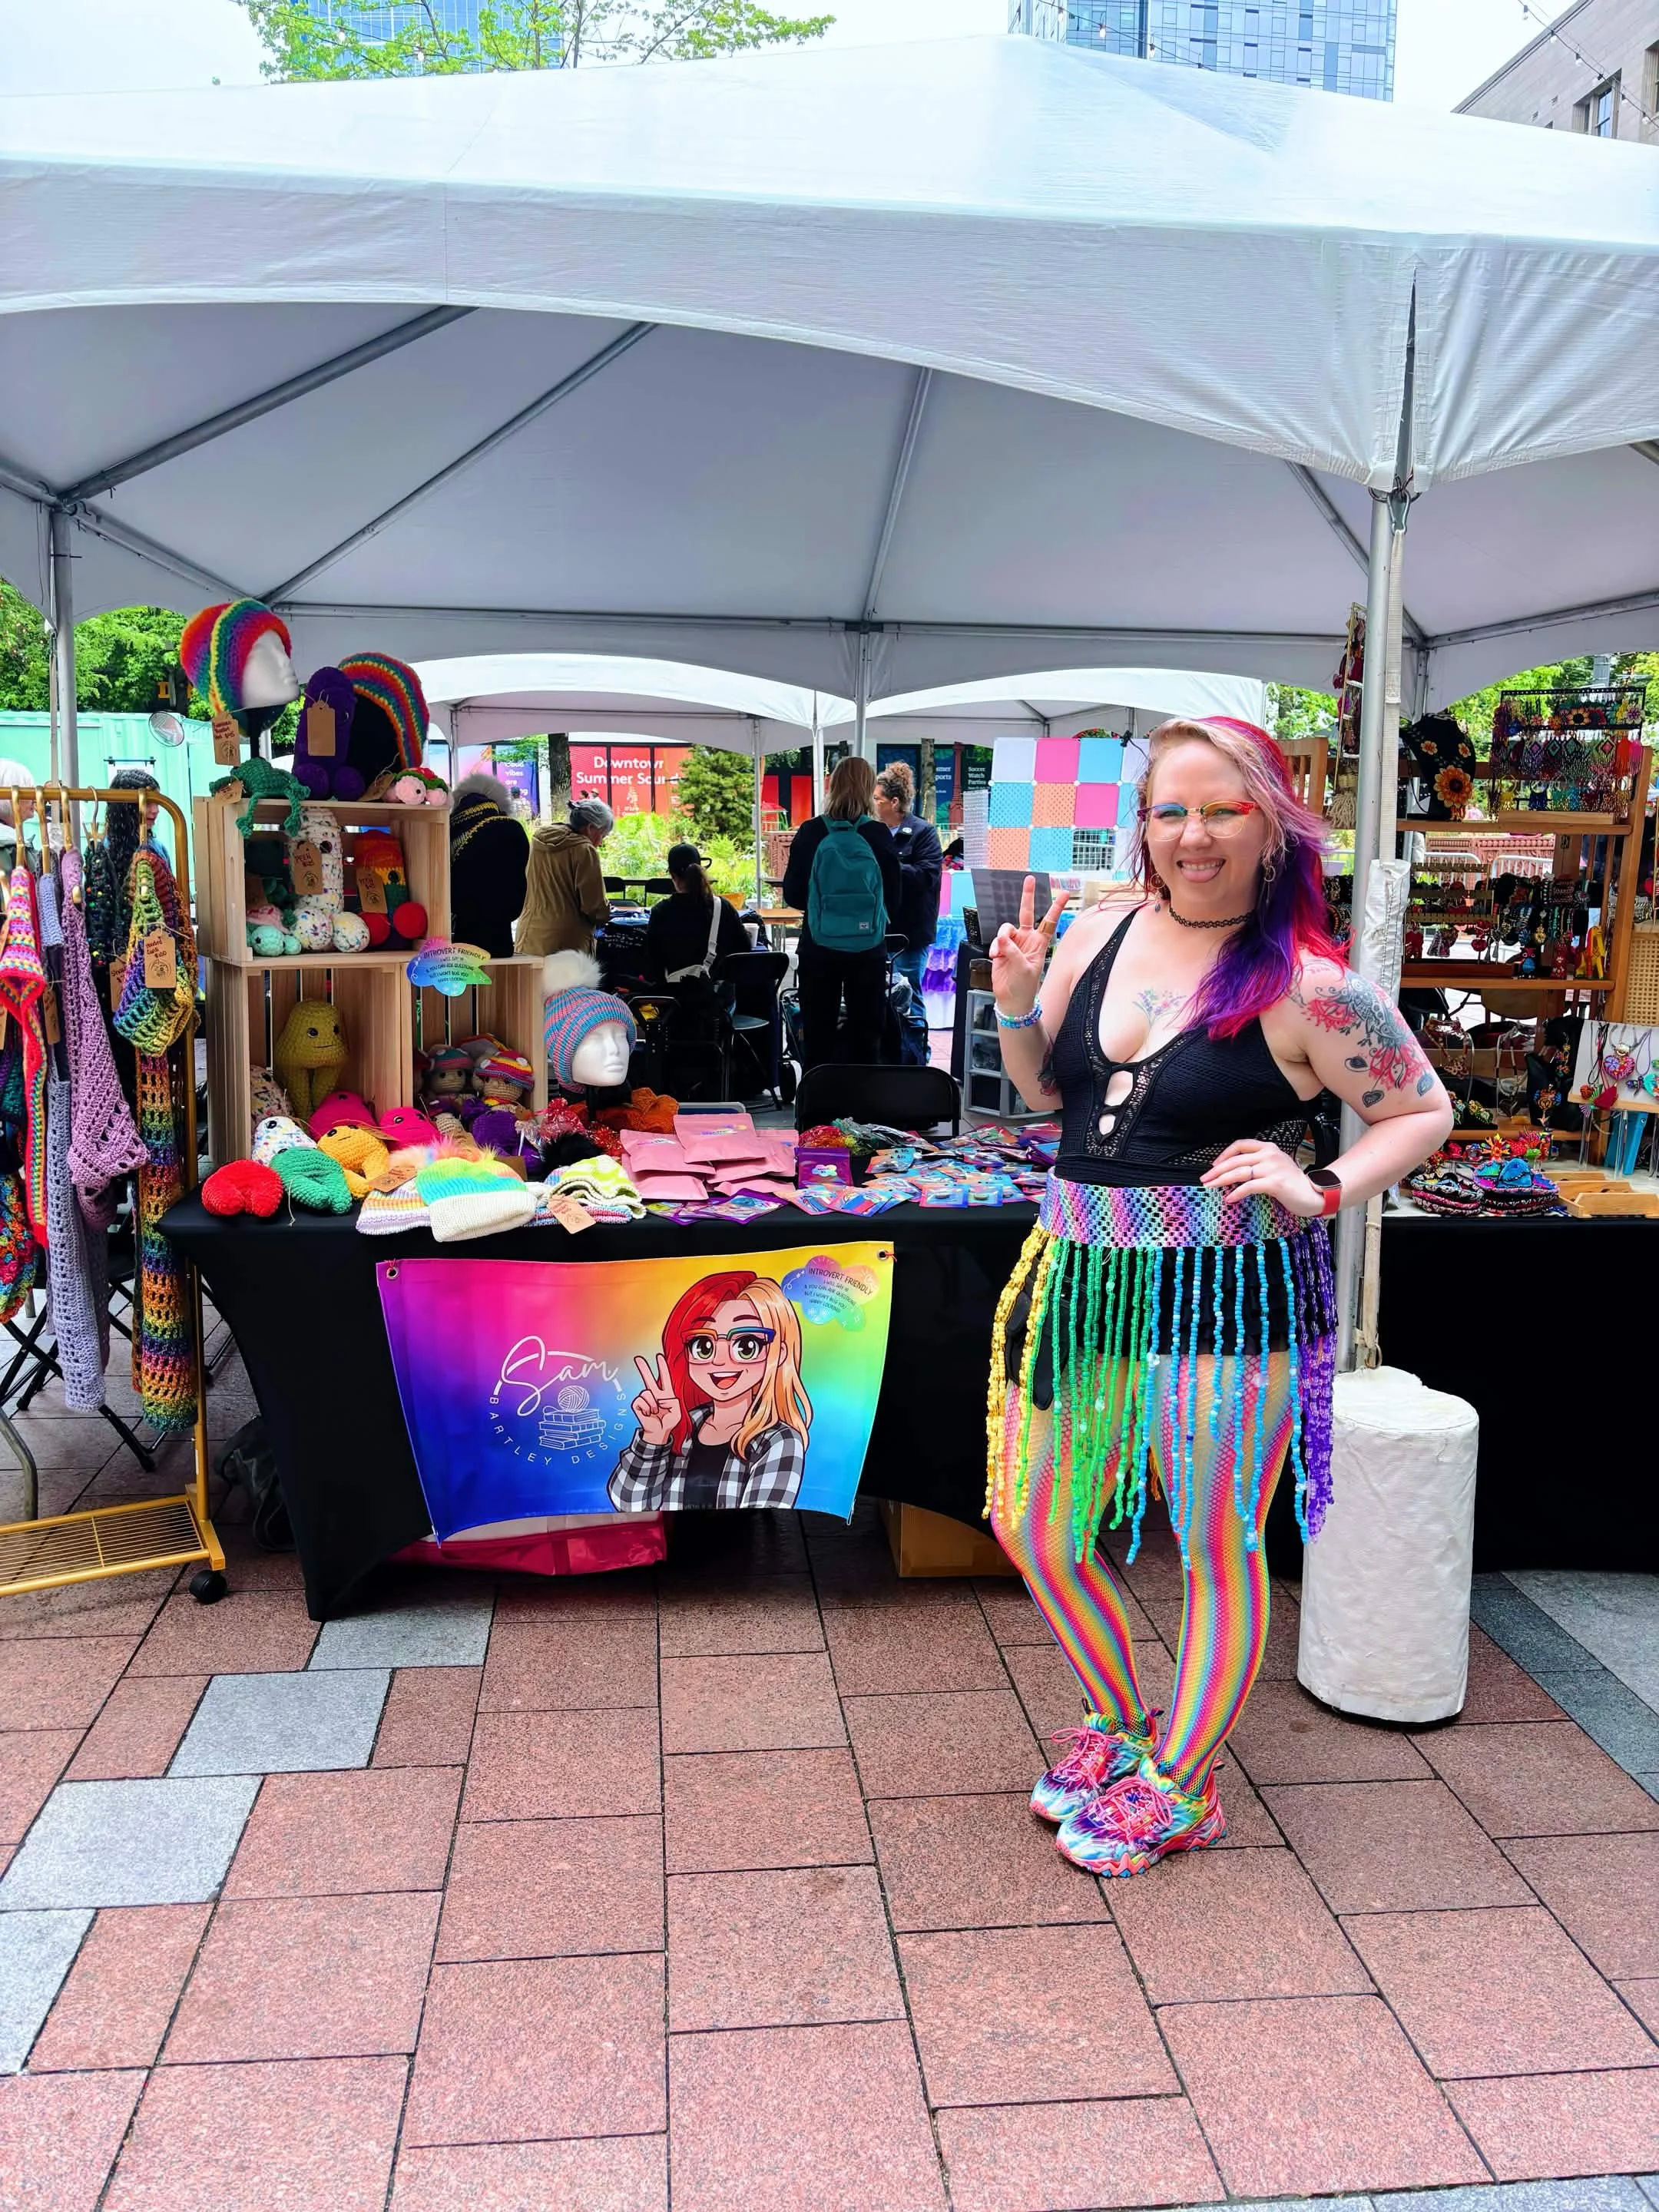
Seattle Pride Parade Market - June 2026 - Seattle, WA
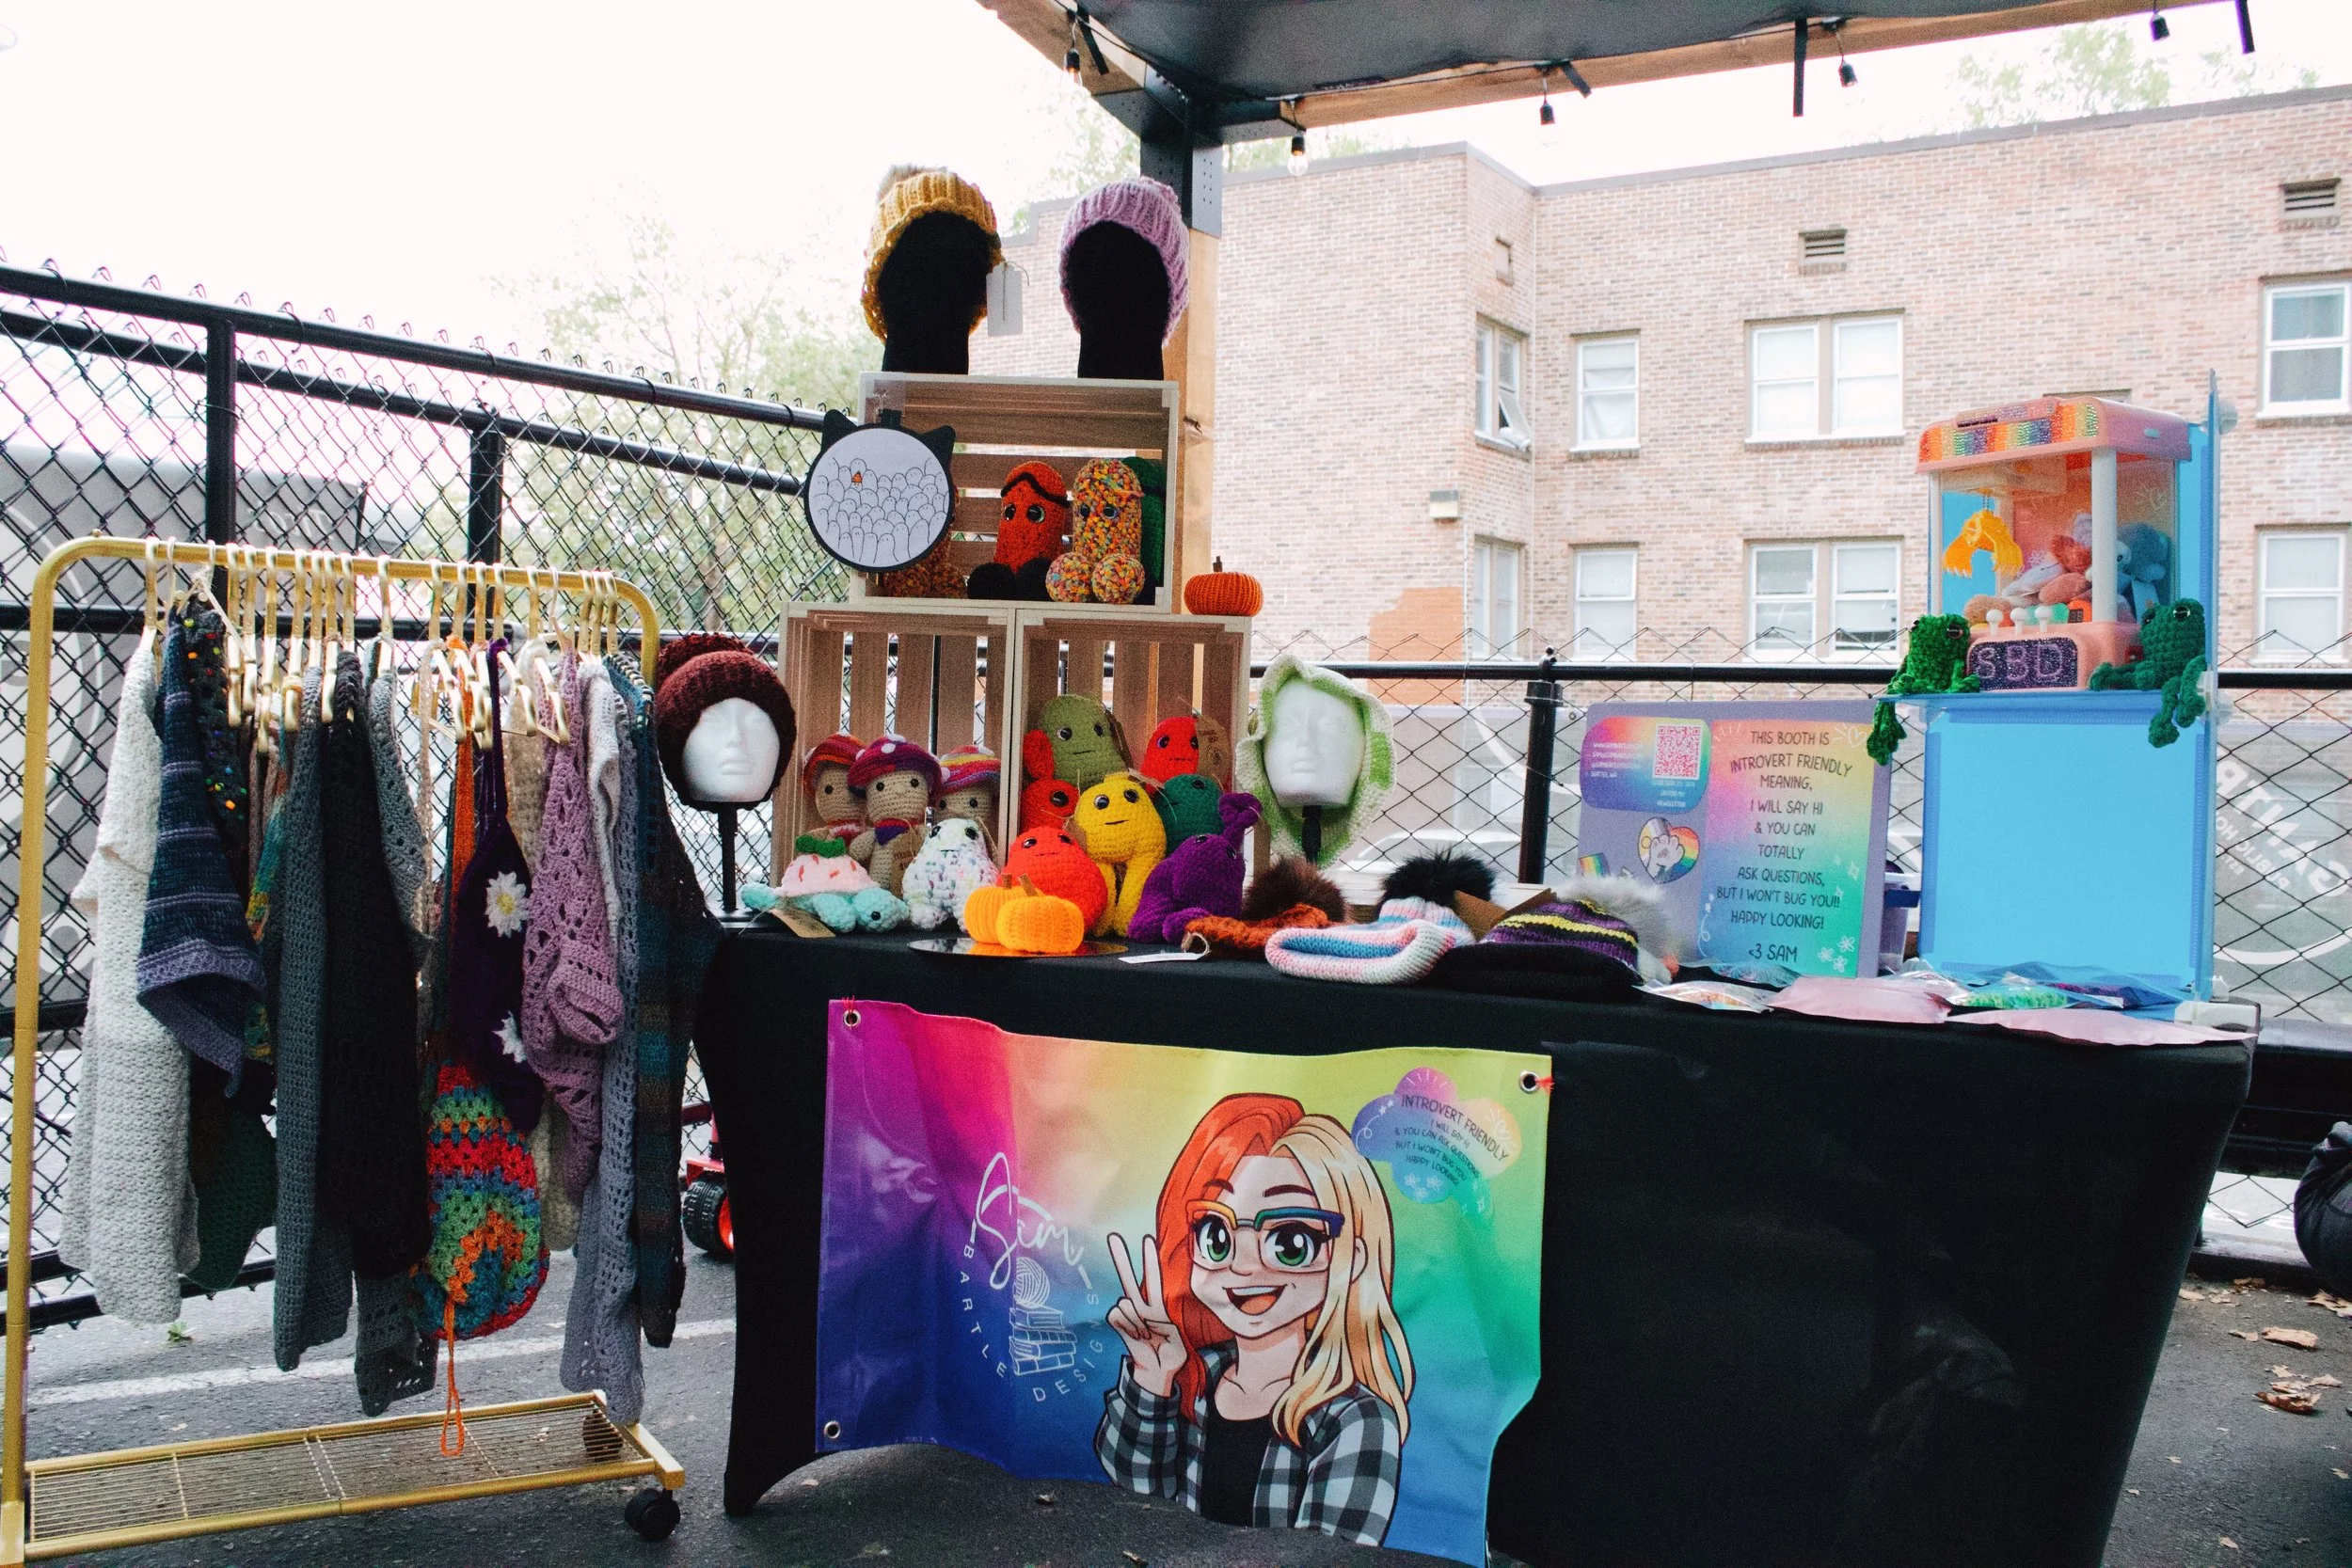
September 2026 Pop-Up Market @ Gantry Public House (Arena) Seattle, WA
For my table I use the following items:
(if you click the words the links pop up for you, or just go to my Amazon Storefront here!)
4 hat stands
Hanging clothing rack (optional if allowed/needed)
That's it! Obviously I have other things at my booth, like my belt bag thing, my square reader, my rolling bag filled with emergency supplies, and my projects to work on while I am there, and other odds and ends, but that's the list for what goes ON my table. (If you want the whole list of my entire "market booth supplies" list, it's at the bottom of this post!)
I like to keep my table tall, with my favorite items at eye level (ish) area. Those aren't necessarily my "big ticket" items, because those tend to be on my hanging rack, but the items I sell the most, like my peens and my beanies. I make do with the space I have and 6 feet is not as much room as your brain may think it is lol.
And this isn't my final form, as the kids say. This is just the intro to my booth, and once I start bringing in more sales I can upgrade things as I am able to. I want to have an over the table arch, different signage, things like that, so this is just what I could do with the money I had at the time <3
Vendor Set-up # 2 - 10 x 10 Tent with (2( 6 foot tables
When it comes to my 10 x 10 tent booth set-up, I kind of went a little simple for my first big market.
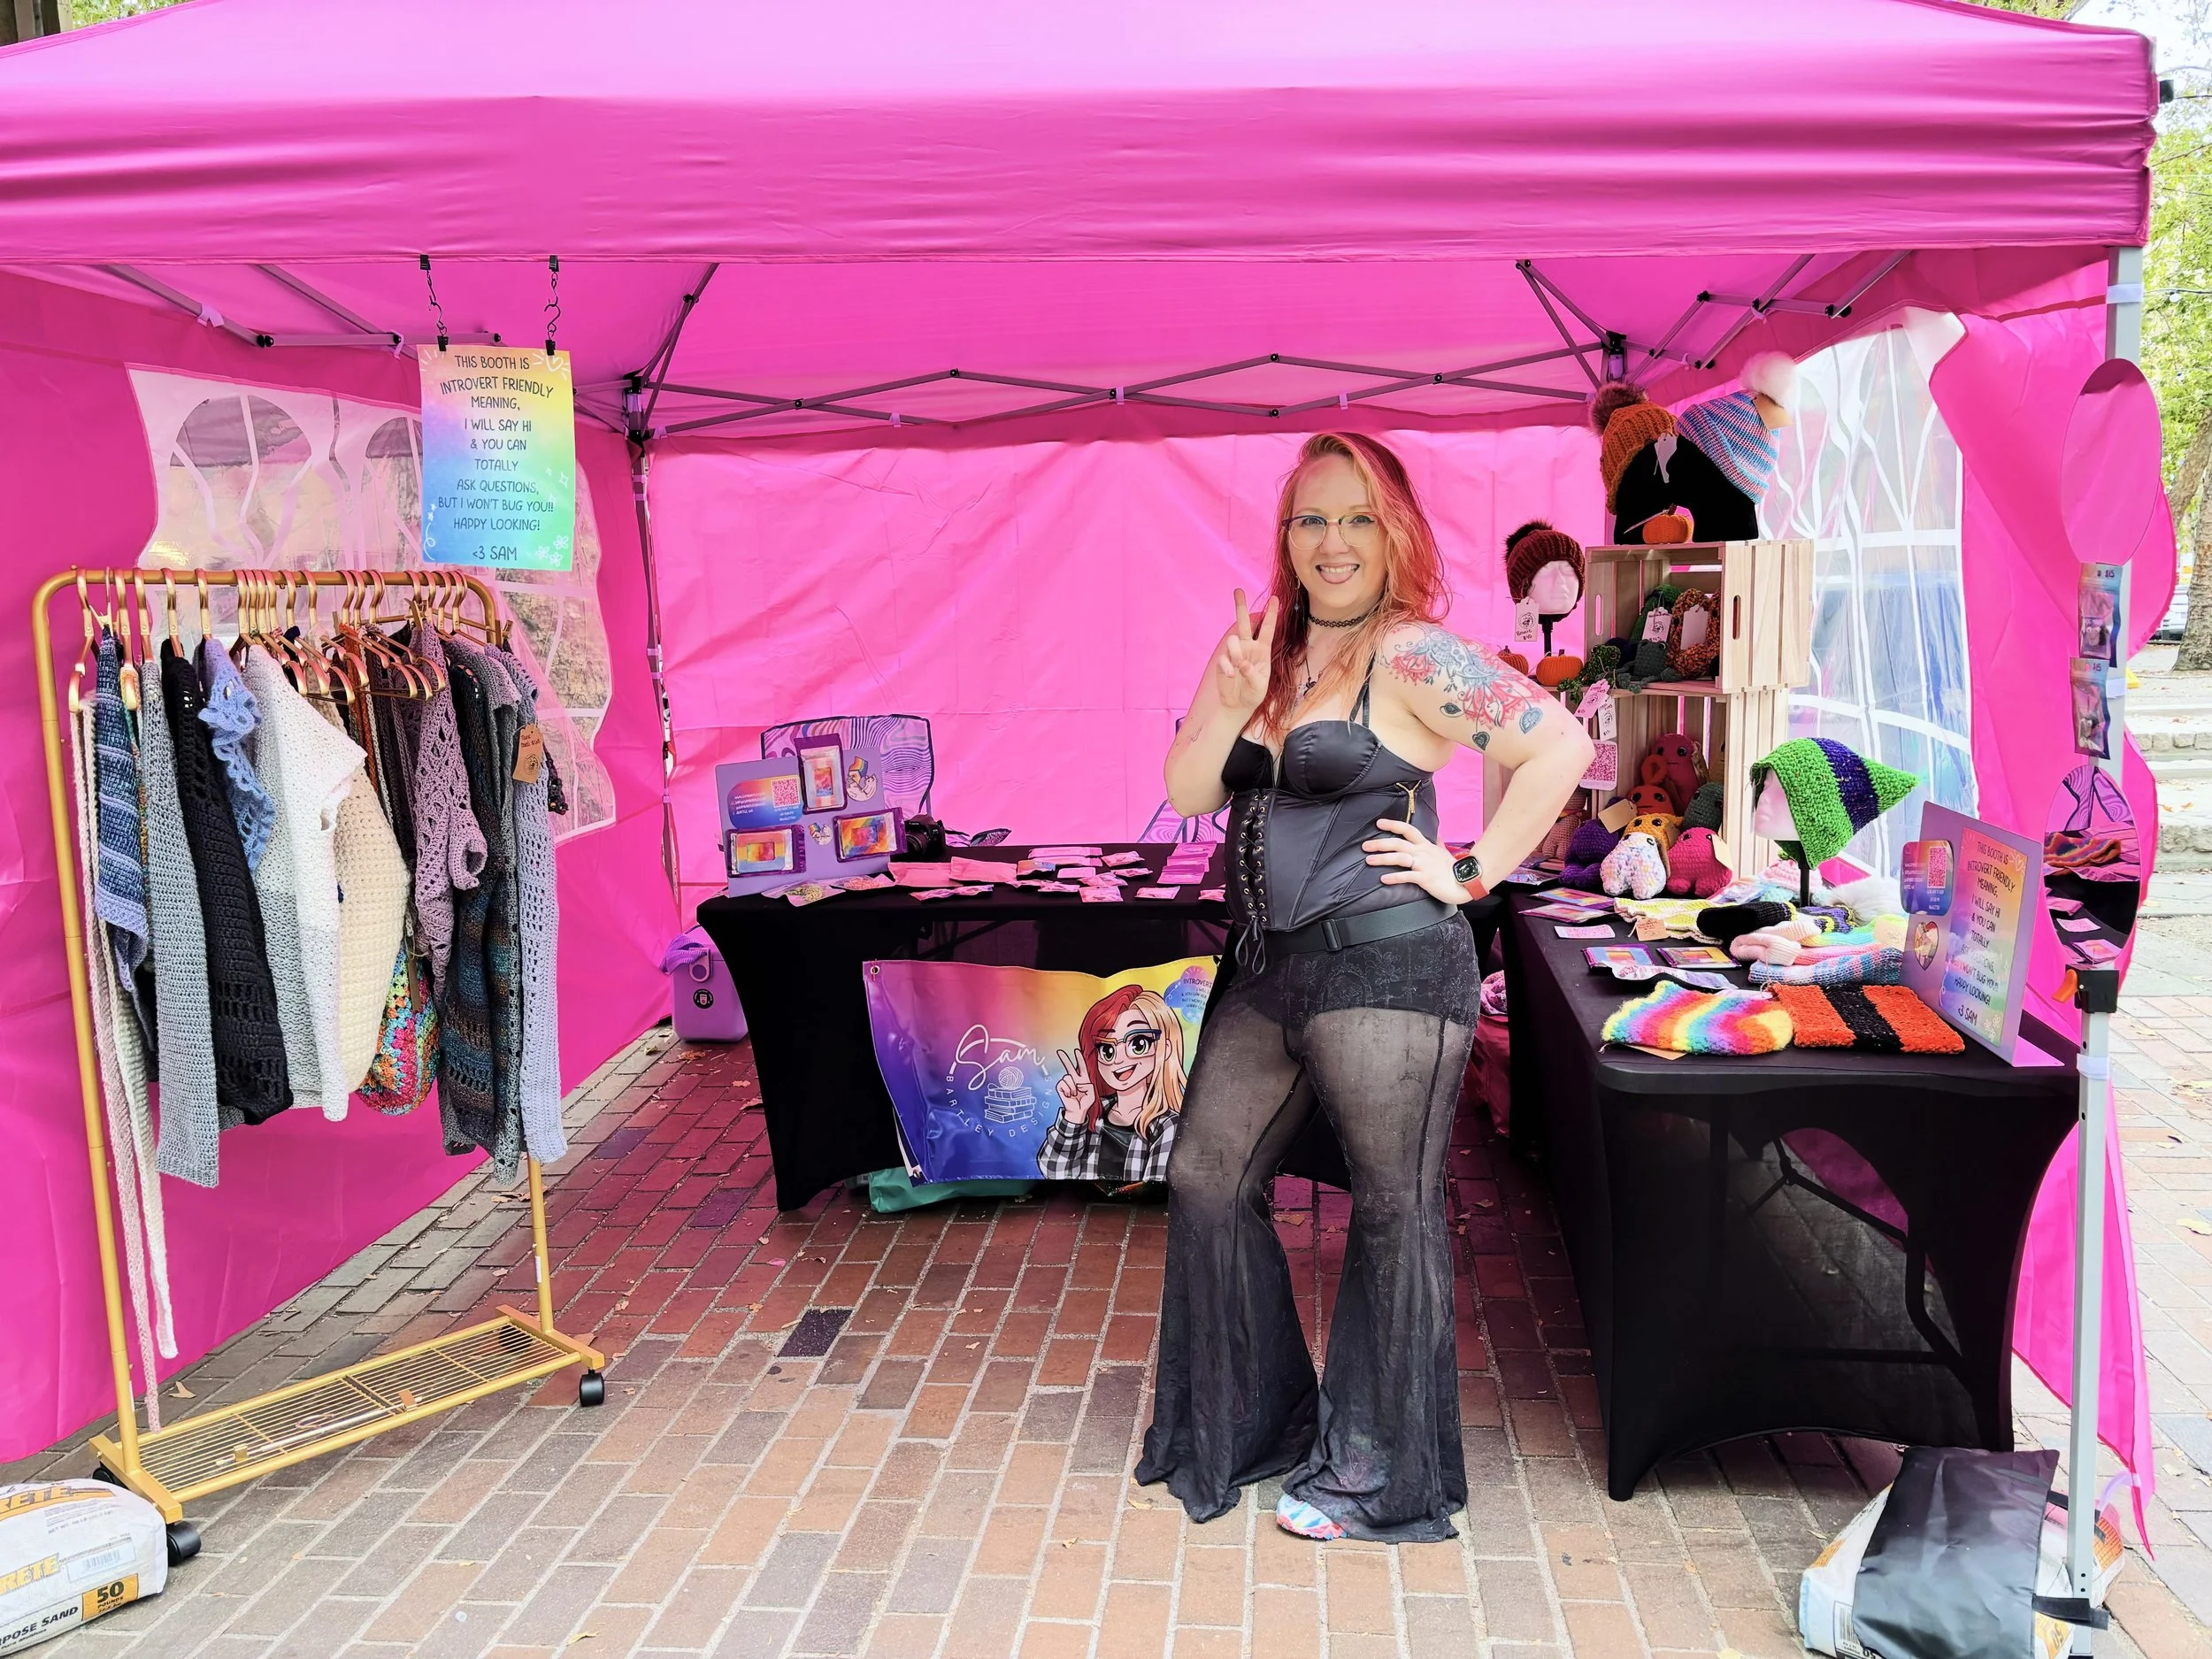
Pioneer Square Market - September 2026 - Seattle, WA
I do have a few things on my wishlist for future markets, but this is what I bought for the first one. (I have only had one market with a 10 x 10 space one time, so I didn't go wild wild.)
200 lbs of play sand for the weights, to hold the tent down (bought at a local hardware store for $8/50 lbs!)
Blue plastic cube shelving (not shown in the first or second market photos, it was added to the 3rd pop-up market, which was the single table set up above)
I actually did better at both smaller markets than I did the larger one, but I also think that has to do with the other vendors and who I was selling with.
Handmade art is desired, but the prices are not expected and that's hard for people to swallow when the booth next door has a whole table of Temu bought trinkets for $1 -$2.
The Extras
For the pals who want to learn more
It's not the shoppers job to know that the yarn for one hand knit or crocheted beanie alone cost $10. That it takes 2 hours to make, and if I pay myself $20/hour, that's less than Seattle's minimum wage ($21.30/hour as of January 2026) that's already $50, not including the pom-pom and leather tag. That's just for the beanie alone. Then you have to also add in the market's booth fee to your costs, which has been $35, $99, and $300 so far, and I've applied to some that are over $1,000. Asking for $45/beanie is a lot, I know, especially in this economy, but when that beanie is taken care of, it lasts for, well, ever and you only have to buy another because it's cute and in a different color and style.
And that's just for a beanie.
My swords? Those take 20+ hours of hand placing every single gem and charm, then even more sealing it all by hand so I can see if I missed any space. Sweaters and clothing? 50 - 100+ hours in some cases. Blankets? There is 2 reasons I only sell 1-2 blankets a year. 1, they take forever to make. 2, they are expensive as hell and take a special kind of person to recognize the work that went into it.
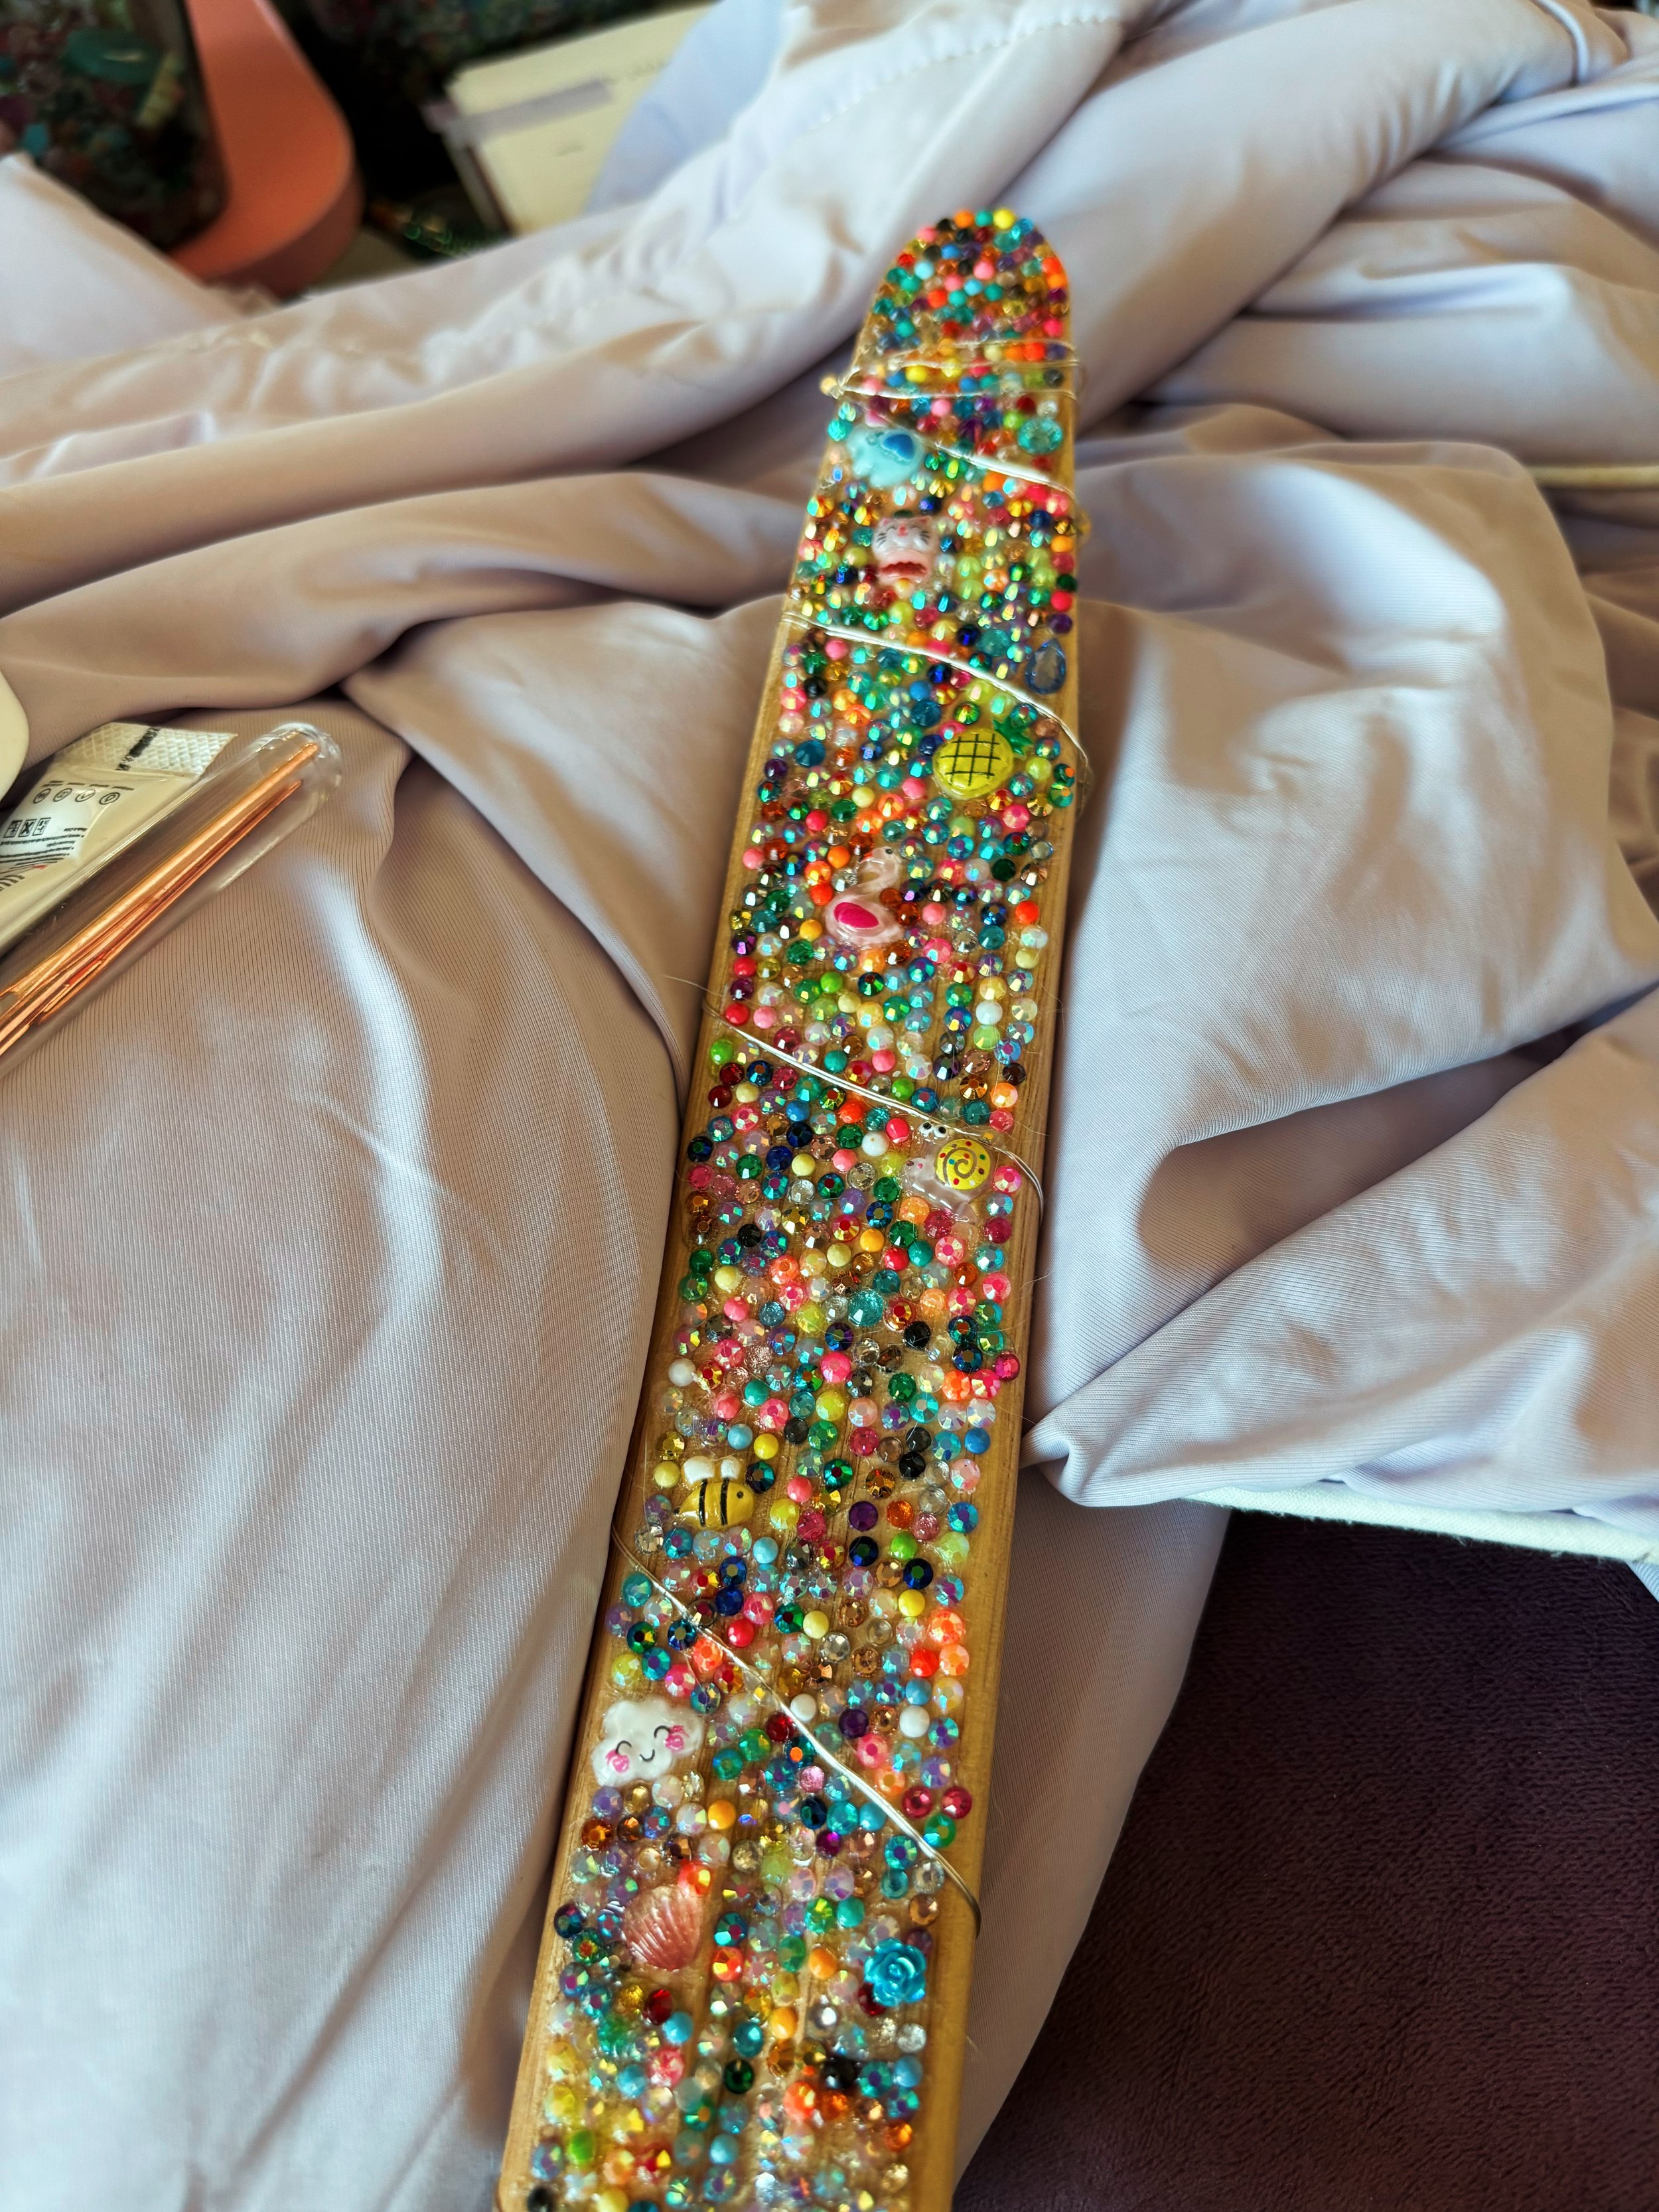
This custom sword wanted fairy lights so we added fairy lights!
My craft isn't common. Not many people mix crochet with sewing and knitting and painting. I embroider freehand and then fill in the blanks with paint and glass beads. I cut up vintage t-shirts and crochet parts of them, and then hand link every single jump ring to create the corset ties on the sides. I paint and bedazzle swords and create chains and metal work for the hilts. (New collections of vintage and swords coming to a market near me soon!)
I know I am different, and that's why I wrote this blog.
That's it for this post! If you get this far, I hope your drink is always the right temperature and you never forget where you were in a project.
Okay, this last part is for those who want to know what else I want to add to my booth, who knows, it might inspire you to do something with your booth!
I have them linked below, with the reasons I want them specifically, and if you want to support me in any way, my throne wishlist (click here) is the best way to do that <3
My booth wishlist
Table top spinning peg board stand - for mystery bags and pins/magnets
10 x 10 outdoor rug - to make it cozy and put together
Fairy lights and vines - decorations
Table top mirrors - to try on things
Standing Mannequin - to hang clothing on next to the hanging clothing rack
Table top clamp arch - to hang lights and vines as accents to make shoppers look up
Folding grid wall - for beanies, bags, plushies, and other odds and ends
4 foot folding table - different layout options
Table risers - to bring items closer to eye level
Okay NOW that's it <3 I hope you learned something, and if not, well, I still hope your drink is the right temperature <3
Xx,
Sam